
Uptime Kuma, a complimentary and open-source monitoring tool, offers the capability to monitor websites and applications in real time. Its interface is web-based and supports a variety of notification methods such as Webhooks, Telegram, Discord, Gotify, Slack, Pushover, Email (SMTP), and more.
Distinct from numerous other monitoring tools, Kuma is self-hosted, requiring you to install and operate it on your servers instead of relying on a cloud-based service method existhods for installing Kuma on your server, including deploying it as a docker package, manual installation, or utilizing a panel such as Easy Panel.
This article will guide you through the process of installing Kuma on Ubuntu 22.04.
The installation of Kuma on Ubuntu 22.04 can provide:
a). Boost the efficiency and dependability of your microservices. Kuma can help to improve the performance and reliability of your system by ensuring that your microservices interact efficiently and effectively.
b). Simplified management. Using Kuma’s centralized control plane might make it easier to manage your microservices, independent of their location or deployment technique.
c). Enhanced Monitoring. With integrated monitoring and alerting features, Kuma also offers the ability to monitor the health and performance of your microservices and swiftly identify any issues that may arise.
Prerequisites for installing Uptime Kuma on Ubuntu 22.04
Before embarking on the installation process for Uptime Kuma on Ubuntu 22.04, we must ensure that your system satisfies the requisite criteria. By taking this measure, any potential compatibility issues can be avoided, guaranteeing a seamless installation process.
First and foremost, it is imperative to confirm that your operating system is Ubuntu 22.04. This specific version is fully supported and highly recommended for installing Uptime Kuma without encountering any compatibility concerns.
Next, verify if your system meets the hardware requirements. While Uptime Kuma is not resource-intensive, it is recommended to have a minimum of 2GB RAM and 2 CPU cores for optimal performance. Additionally, ensure that there is ample disk space to accommodate the installation and future data storage requirements.
In addition, it is crucial to have administrative access or root privileges on your Ubuntu system. This grants you the authority to execute commands and make necessary configuration changes during the installation process.
Lastly, ensure that your system is connected to the internet. Uptime Kuma relies on internet connectivity to fetch essential dependencies, receive updates, and access monitoring data.
By confirming these system requirements, you can move forward with confidence to the next stage of the installation process. Ensuring compatibility and readiness of your system lays the foundation for a successful installation and enables efficient monitoring and management of your network infrastructure with Uptime Kuma.
A Step-by-Step Guide to Installing Uptime Kuma on Ubuntu 22.04
Step #1 – Upgrade your System
Before proceeding with the installation of Uptime Kuma, it is recommended to execute the below command to ensure that all the packages on your Ubuntu 22.04 LTS system are up to date:
sudo apt update && sudo apt upgrade
Step #2 – Install the NodeJS Package
After updating your system, proceed with the installation of the NodeJS package.
Note: The long-term stable version of Node.js (Node.js v12) available via the APT package manager on Ubuntu 22.04 needs to be updated. It is recommended to have at least version 14 installed.
Installation of NodeJS is straightforward. Add the NodeJS repository to your system, then run the installation command.
1. Add the NodeJS repository using the following command:
curl -fsSL https://deb.nodesource.com/setup_lts.x | sudo -E bash –
2. Install NodeJS:
sudo apt-get install -y nodejs
Step #3 – Clone Kuma Project using Git
Uptime Kuma is not currently available in the default Ubuntu repository. However, it can be installed by cloning the project from GitHub using Git.
To clone the Kuma project onto your system, execute the following command:
git clone https://github.com/louislam/uptime-kuma.git
If Git is not yet installed on your system, it can be easily installed using the following command:
sudo apt install git
Step #4 – Install Kuma
Once the Kuma project has been cloned onto your system, navigate to the project folder and run the installation command.
1. Go to the uptime-kuma folder:
cd uptime-Kuma
2. Install Kuma:
npm run setup
Step #5 – Install PM2
PM2 is a powerful production process manager for Node.js applications, including a built-in load balancer.
With PM2, your applications can run continuously, be reloaded without any downtime, and have various system admin tasks simplified. Execute the following command to install PM2 on your Ubuntu 22.04 system.
Install PM2:
sudo npm install pm2 -g && pm2 install pm2-log rotate
Use PM2 to run the Uptime Kuma server in the background.
Start Server:
pm2 start server/server.js –name
Upon initiating the server, proceed to draft a service document for PM2 to facilitate the automatic startup of Kuma during system booting. Utilize the “pm2 startup” command to achieve this.
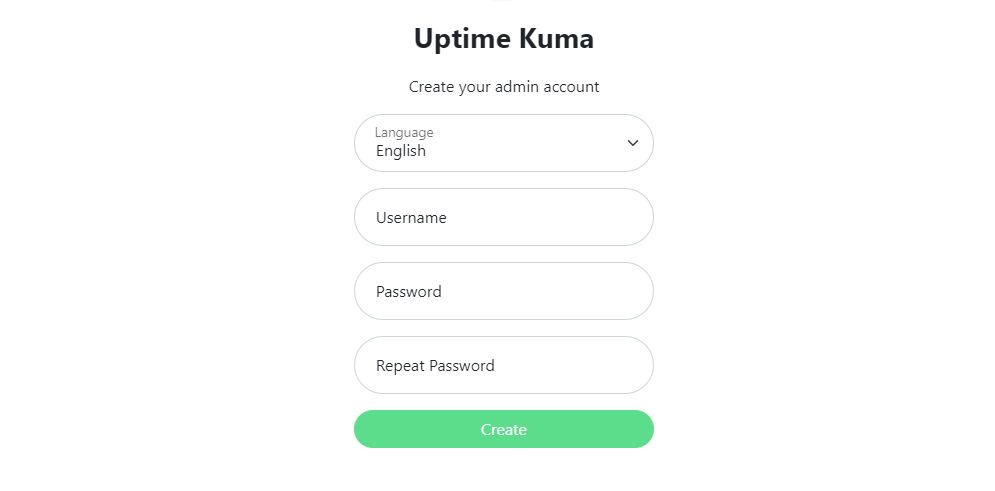
Step #6. Uptime Kumar Web Interface
To access the web interface of this application, launch a browser on the system where it has been installed and browse to the server’s IP address, using port 3001 as the default for Kuma.
Uptime Kuma VPSie
Uptime Kuma presents a simplistic yet intuitive interface, suitable for effortless usage. Adding websites and devices is a straightforward process.
Step #7. Obtain an SSL Certificate
This step is not mandatory, but it is highly recommended that you complete it.
An SSL certificate is crucial in ensuring the security of user information and safeguarding against potential hackers. It is wise to obtain an SSL certificate for any professional website that handles sensitive data, such as financial or medical records. If your company operates an e-commerce website or collects sensitive customer data, it would be beneficial to familiarize yourself with the process of obtaining an SSL certificate.
If you are not using a third-party SSL provider or DNS manager, you can automatically generate an SSL certificate for the domain used for Uptime Kuma on Ubuntu 22.04 with Let’s Encrypt, free of charge.
Install Certbot:
sudo apt install certbot
sudo apt install python3-certbot-apache
sudo certbot –apache -d your-domain-name.com
Replace “your-domain-name.com” with your domain name.
This is all it takes. Your Uptime Kuma will now be equipped with an SSL certificate.
Configuring Uptime Kuma for optimal performance and security
a). Keep Uptime Kuma up to date with the current version to take advantage of bug fixes and performance improvements.
b). To safeguard the connection between Uptime Kuma and your web browser, enable SSL/TLS encryption.
c). Use a firewall to restrict access and update firewall rules regularly to counteract threats.
d). Enable two-factor authentication (2FA) to improve security by demanding an additional form of verification.
e). Improve database performance by tweaking configuration parameters and monitoring performance regularly.
f). Set up alerting and notification systems to receive notifications of any difficulties or outages as soon as possible.
e). To avoid data loss, implement a solid backup strategy that includes regular backups of both the database and application files.
Testing the Uptime Kuma’s web interface
Following the successful installation of Uptime Kuma on your Ubuntu 22.04 server, the next step is to visit and test the web interface. This tool allows real-time monitoring of your websites’ or servers’ uptime and performance.
#1. To use this web interface, launch a web browser on your local workstation and input your server’s IP address or domain name, as well as the port number 3001. If your server’s IP address is 192.168.1.100, your address bar entry would be “http://192.168.1.100:3001.”
#2. When you press Enter, you will be sent to the Uptime Kuma login page. Enter the username and password you set up during the installation procedure. You will be brought to the Uptime Kuma dashboard if all settings are proper.
#3. The dashboard provides a summary of your monitored websites or servers, including their current status, response time, uptime %, and other information. You can customize the dashboard by adding or removing widgets to meet your monitoring needs.
#4. You can try adding a new website or server for monitoring to test the web interface’s operation. Click the “Add New Monitor” button and enter the required information, such as the URL or IP address, monitoring interval, and notification preferences. After being included, Uptime Kuma will monitor the given resource and display its status on the dashboard.
#5. Furthermore, you can explore the online interface’s different features and options. Setting up alerts, establishing email notifications, generating reports, and viewing historical uptime data are all part of this.
#6. It is advised that you check and test the Uptime Kuma online interface regularly to maintain proper functionality and to be updated about the uptime and performance of your websites or servers. You may use this powerful tool to proactively discover and repair any difficulties, thereby enhancing the dependability and availability of your online presence.
How To Update Uptime Kuma
It is critical to maintain your Uptime Kuma up to date for it to be secure and functional. This includes ensuring that you receive the most recent security updates, bug patches, and amazing new features.
Simply run the following commands in the Uptime Kuma directory to update it:
git pull npm install pm2 restart uptime-kuma.
This updates the Uptime Kuma code, installs any new dependencies, and uses PM2 to restart the Uptime Kuma service.
In Conclusion
In this digital age of connectivity, monitoring systems and services continuously is crucial.
That’s where Uptime Kuma comes in – a valuable tool with a user-friendly interface, versatile monitoring features, robust alerting system, and the advantages of being self-hosted and open-source. These features make it a reliable solution for system administrators striving to maintain optimal performance and uptime of their services.
In this tutorial, you have learned how to install and self-host Uptime Kuma on your server. But of course, if you encounter any difficulties during the installation process, you need not fret. Simply reach out to the Invoice Ninja community and connect with an expert who will assist you in installing Uptime Kuma on Ubuntu 22.04 without a hassle.